Workflows are now important part of any project. We can develop a Microsoft SharePoint Workflow using the available templates, SharePoint designer and Visual Studio. In this post will mainly focus on workflow creation using Microsoft SharePoint Designer.
Workflow created in three ways using Microsoft
SharePoint designer:
1. List workflow
2. Reusable workflow
3. Site workflow
More details see my previous post
Follow the steps for simple workflow, where current
date set in list item through SharePoint designer.
Create a list for SharePoint workflow:
Here, I will create list using UI but you we can also by using SharePoint
Designer
1. Open the SharePoint
site and login.
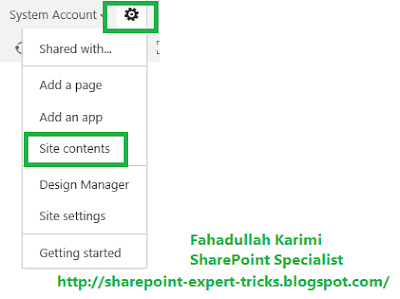
2. Go to Site
and Click on "Settings" and then click on "site contents"
option.
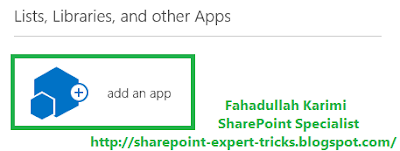
3. Click
on "add an app".
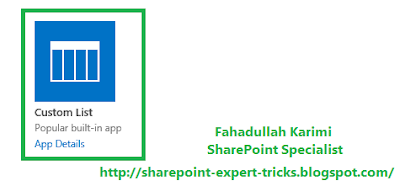
4. Select
"Custom list" option from the "app" page. It will be popup for
open create custom list.
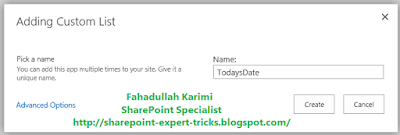
5. Provide the name and
click on Create.
6. Now custom list created in the site, we can add as many as need
columns with different data type.
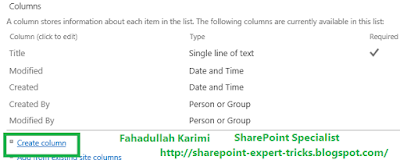
7. Now open create custom list and go through list
setting and click on “Create column” option and create multiple column with
different data type as per need.
8. I have added Current Date and Description filed in this list.
Create workflow in SharePoint
designer:
1. Open your SharePoint site in SharePoint designer.
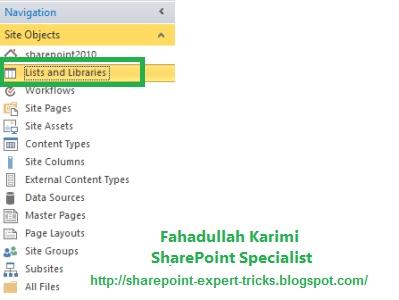
2. Click on "List and library" option in Navigation
section.SharePoint Designer Lists and Libraries
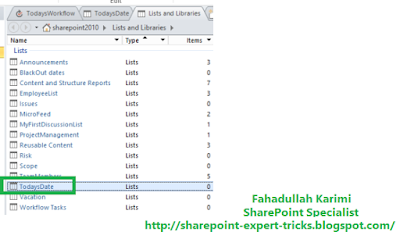
3. Select "TodaysDate" List and double click on
it, it will open list’s properties.
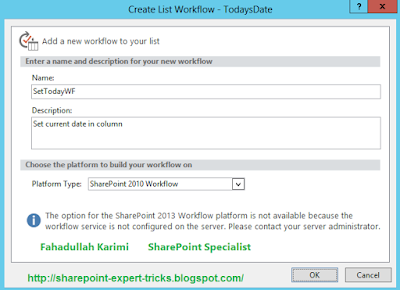
4. Now, Click on "List Workflow" in ribbon bar
and fill-up workflow information.
5. It will open new window for workflow.
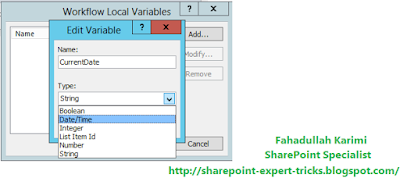
6. Click on "Local Variables" in ribbon bar.
7. It will open local variable window, where you can
local add variable.
8. Add current date as local variable.
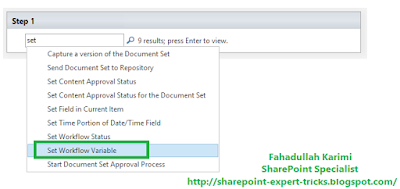
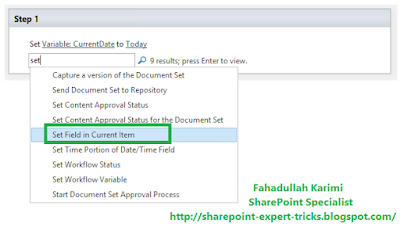
9. Now, come on workflow part, write set and just click
on search option and select "set Workflow variable".
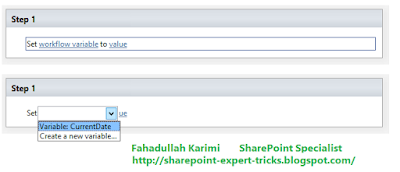
10. Now, click on "workflow variable" and select
"CurrentDate" option from dropdown.
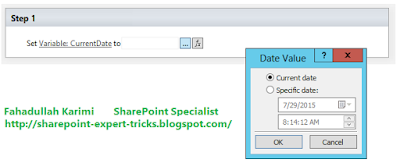
11. Now click on value field and set current date option.
12. Now select under line option and select.
13. Select "set Field in current Item".
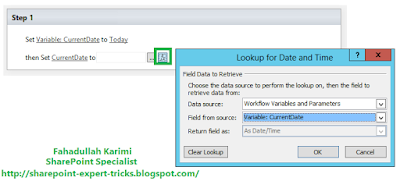
14. Now, click on Field item and select
"CurrentDate".
15. Now, click on Value
filed and click on selected item.it will open one pop-up. You have to select
Data source as “Workflow variable and parameters” and Field from source as
"current date".
16. Click on workflow settings in
ribbon bar.
17. Select "Start workflow
automatically when an item is created" option. This option our workflow
will be automatically start on while any item is adding.
18. Now
click on Publish button in the ribbon bar. So our workflow will be publish and
its ready to use.
Microsoft SharePoint Workflow Check
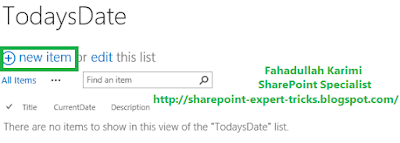
1. Open SharePoint site and open TodaysDate custom list.
2. Click on new item. It will open popup for entering
value. You have to just add Title field’s value and click on save button.
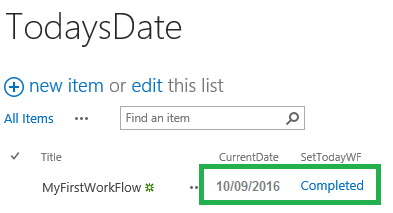
3. Now,
our workflow will start and it will set current date field’s value and workflow
will completed.
Thank you very
much
Fahadullah Karimi
SharePoint Specialist
| List WorkFlow Vs Reusable WokFlow Vs Site WorkFlow | Step by step installing and configuring SharePoint Server 2016 on Windows Server 2012 R2 |










 Next Post
No comments:
Post a Comment