Step by step Configure User Profile Service Application on SharePoint Server 2013
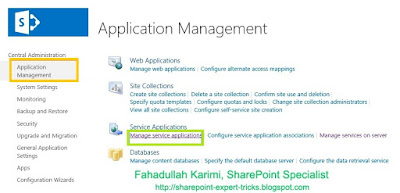
1. Central
Administration--> Application management-->Manage service applications.
2. Manage
service applications-->New-->User Profile Service Application.
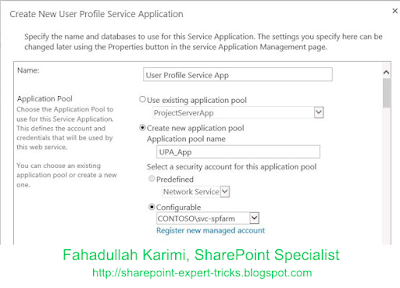
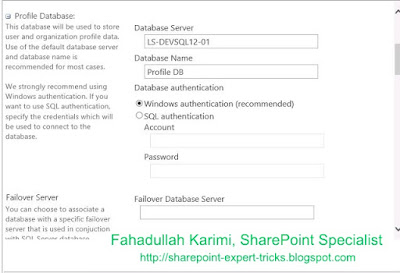
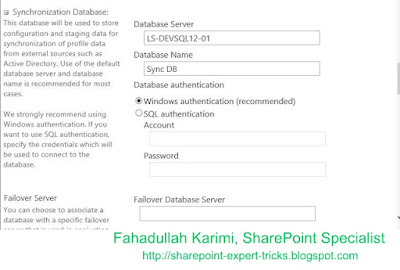
3. Provide the following details:
Name
Application Pool
Name
Service Account:
farm but change it to a service account later after creation
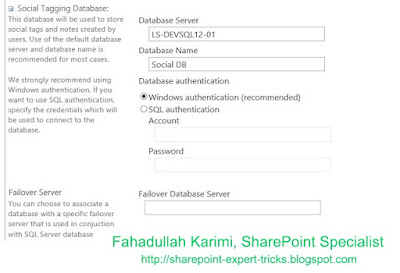
Database Server
Name:
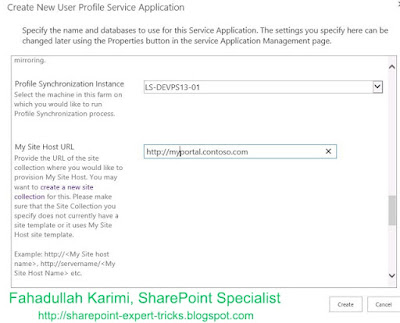
My Site Host URL:
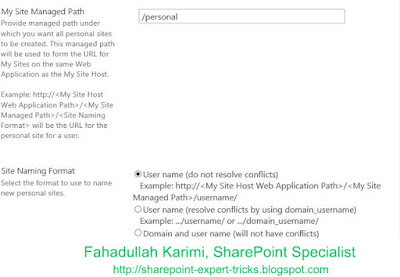
My Site Managed
path:
Site Naming
Format:
4. Click OK
5. Start the following Service
User Profile Service
User Profile Synchronization
Service
6. Run an IISRESET.
7. To configure a
synchronization connection,
Central Administration >> Application Management
>>Manage Service Application >> User Profile Service >>
Configure Synchronization Connection
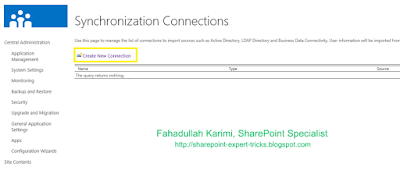
8. Add a new
connection
9. Provide the Sync Connection Name
Select Active Directory
Provide
the Domain Controller Name
Select the Authentication Provider as Windows Authentication
Provide
the Service Account details
Service account should be Read Delegation rights on
Active Directory Domain Controller
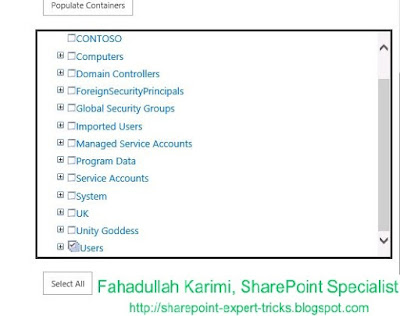
10. Click on Populate Containers
Select the Containers
where you have got users.
11. And after
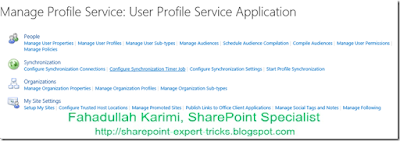
that click "OK". After that go to User Profile Service Application
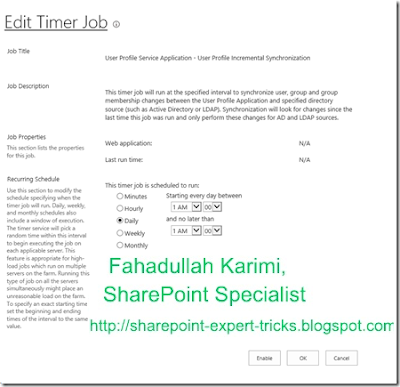
12. Click on "Configure Synchronization Timer Job". Set time
intervals for sync there
13. Go to User Profile Service Application and click on "Start
Profile Synchronization" to start sync.
14. This is first time so we are choosing sync, choose "Full
sync"
Now Synchronization Status” has changed
from "Idle" to "Synchronizing".
15. Click on the “Synchronizing” link to get the sync
status
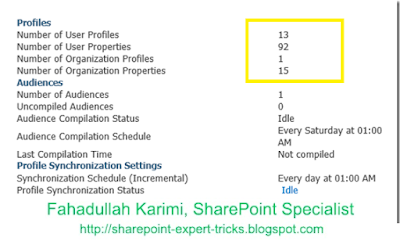
After the sync is completed, the status changes again
“Idle”, and the results of sync in the Profiles section.
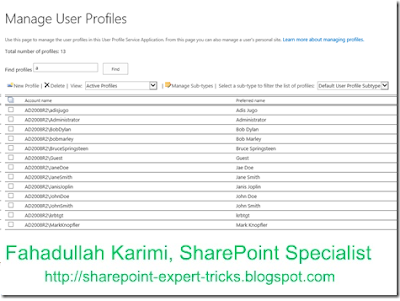
16. Again go to User Profile Service Application and
click on "Manage User Profiles".
After modifying some
querying, here is user with their properties.
Thank you very
much
Fahadullah Karimi
SharePoint Specialist
| Configure Search Service Application on SharePoint Server 2013 | Web Application creation on SharePoint Server 2013 |













 Next Post
one two slim купить https://one-two-slim-kapli.ru/ Сегодня считается лекарством номер один среди препаратов для похудения. Революционная формула капель позволяет удалять жировые прослойки с учетом биоритмов человека. Капли изготовлены на основе натуральных ингредиентов (ягоды асаи и годжи, гарциния и гуарана, грибы рейши и кора крушины, крапива и береза). Это два жидких концентрата, которые, возможно, первый из них следует принимать утром, а второй вечером.
ReplyDelete