Using the delegate control we can customize the SharePoint site controls without editing the master page by injecting user controls, scripts, css through this special type of control.
We are not customizing the existing (default) delegate control but we are
creating our own control loading onto the SharePoint site.
The following code to add a delegate control
<SharePoint:DelegateControl
runat="server" AllowMultipleControls="true" ControlId="IDofControl"/>
Some default Delegate controls:
SharePoint 2013:
SuiteLinksDelegate
SuiteBarBrandingDelegate
PromotedActions
SharePoint 2010:
AdditionalPageHead
GlobalSiteLink0
GlobalSiteLink1
GlobalSiteLink2
PublishingConsole
QuickLaunchDataSource
SmallSearchInputBox
TopNavigationDataSource.
Follow the Steps to Create a Delegate control in
SharePoint 2013 using Visual Studio 2013:
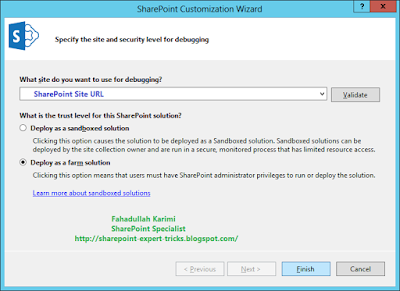
1. Open Visual Studio 2013->File -> New
Project, -> Empty Project.
Confirm
SharePoint Site URL for debugging and choose deploy as farm solution.
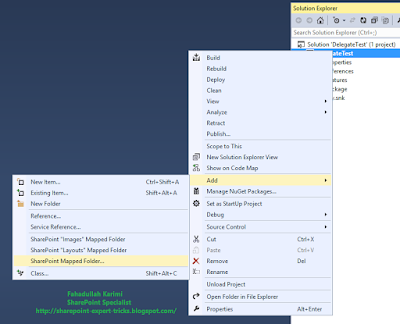
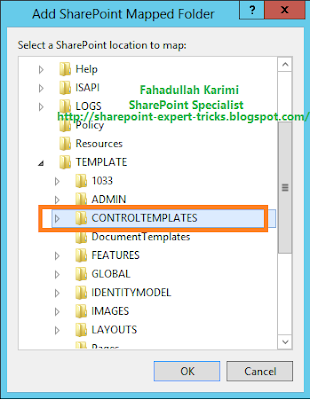
2. Add CONTROL TEMPLATES Mapped folder into the
project. Right click on the project -> Add -> SharePoint Mapped Folder.
3. Select CONTROL TEMPLATES
4. Now, Right
click on the folder -> Add New Item and then select User Control (Farm
Solution Only) to add User Control.
5. Logic for delegate control. I have just put a text
message.
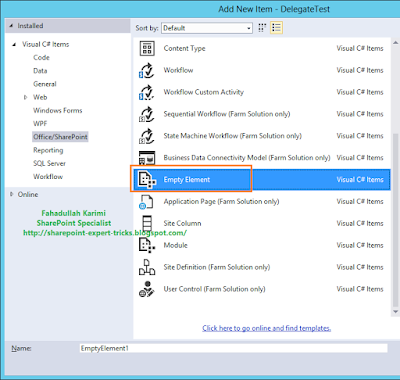
6. Again, Right click on the project -> Add New
Item - > Empty Element.
Now the solution and project as below
By using Delegate controls we can inject a code or
control to a SharePoint master page without touching the code of the master
page.docx
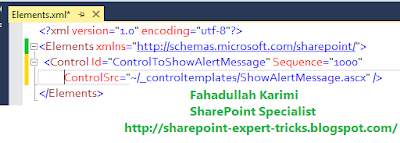
7. Add the following code in Elements.xml file:
<Control Id="ControlToShowAlertMessage" Sequence="1"ControlSrc="/_controltemplates/15/ShowAlertMessage.ascx" />
Control Id using this we can call in master page.
ControlSrc : Path of user control.
Now build and deploy the project. After deployed
successfully, and you deployed in web scope then it will show in Site Feature
8. Add call the control in master page by control id
Just Open master page using SharePoint designer 2013
and Check out and Edit in Advanced mode and paste the following code in the
master page.
<SharePoint:DelegateControl
ControlId="ControlToShowAlertMessage"
AllowMultipleControls="true"
runat="server"></SharePoint:DelegateControl>
ControlId is the id of user
control given in Elements.xml file.
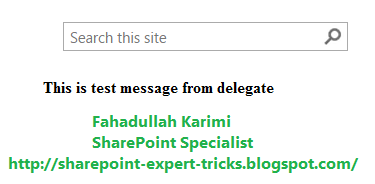
9. Now check in
and publish the master page as a major version, and delegate control will
appear:
If you do not want to show
message then just deactivate this feature
Go to Site Settings -> Manage
Site Features. And then in the Manage Site Features page you can deactivate the
feature. The delegate control will not appear.
Thank you very
much
Fahadullah Karimi
SharePoint Specialist
| Step by step upgrade from SharePoint 2010 to SharePoint 2013 | How to Create Master Page Using Design Manager in SharePoint 2013 |



 Next Post
No comments:
Post a Comment