Wednesday, August 31, 2016

How to Create Master Page Using Design Manager in SharePoint 2013


 Design Manager is one of the new features introduced in SharePoint 2013. Design Manager only available on publishing site template and the other default templates does not have this feature. Design Manager has a lot of features.

With Design Manager, you can now create a SharePoint Master Page out of a simple Html Page Template that can reuse from an existing public site or download from Internet.

Steps to create master page using Design Manager


1. Create sample HTML Page

<html>

<html>

<head>

<title>Fahadullah Blogs</title>

<link href="Style/Blogs.css" rel="stylesheet" />

</head>

<body>

<div class="page_layout">

<div class="blogtitle">

How to Create Master Page Using Design Manager in SharePoint 2013

</div>

<div class="blogcontent">

Design Manager is one of the new feature introduced in SharePoint 2013. Design Manager only available on publishing site template and the other default templates does not have this feature. Design Manager has a lot of features.

With Design Manager, you can now Create a SharePoint Master Page out of a simple Html Page Template that can reuse from an existing public site or download from Internet.

Steps to create master page using Design Manager

</div>

<div class="banner">

<img src="Image\Banner.png" alt="Fahadullah">

</div>

</div>

</body>

</html>


2. CSS

body {

body {

     font-family: Calibri;

     width: 98%;

 }


 div {

     word-wrap: break-word;

 }


 .page_layout {

     padding: 10px 0px 0px 10px;

 }


  .banner {


    height: 100px;

    margin-top: 100px;

    display: block;

}

 .blogtitle {

     width: 78%;

     float: left;

     font-size: x-large;

     font-weight: bold;

     color: #cc6611;   

     text-decoration:none;  

     margin-left:50px;

 }


 ul.bloglist {

     list-style-type: circle;

     font-size: medium;

     font-weight: bold;

     font-style: italic;

     color: #000066;

 }


 .blogcontent {

     float: left;

     width: 78%;

     padding: 5px 5px 0px 70px;

     top: 20px;

 }


3. HTML Page View


HTML Page View

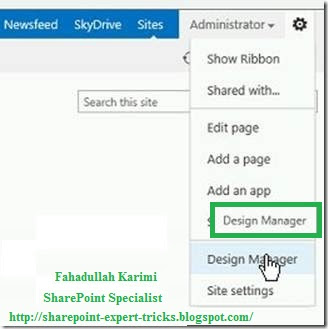
4 .Click design manager from right top corner "Settings" menu.


Design Manager


5 .Click the Upload Design Files.


Upload Design Files


6 .Click the URL and it will provide the network path then map the network drive.


Map Network Drive


7. If you get following error


Error Map Network Drive


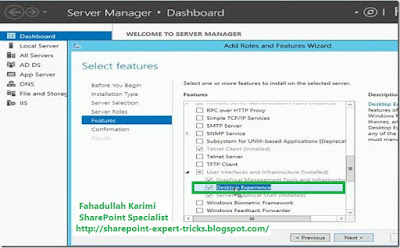
 8. Then add the "Desktop Experience" feature to your server using Server Manager.


Add Feature

After the feature activated restart the server then maps the network drive.

 9. Copy all the source files then paste to mapped path.

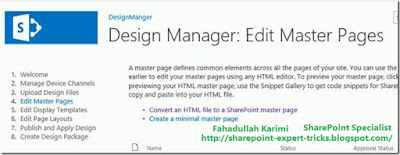
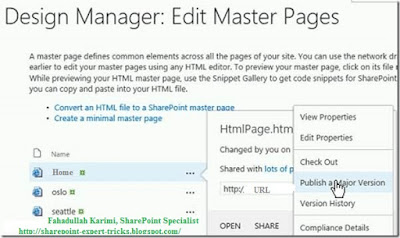
10.  Open the design manger then click Edit Master Pages and then click "Convert HTML file to SharePoint Master Page"

Edit Master Pages


11. It will open a pop up window then select the uploaded html page then click Insert.


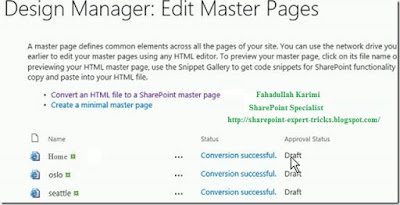
12. Automatically converted from HTML to SharePoint Master Page. The approval status is DRAFT.

Converted Master Page


13. Check the preview and see the master page then back to the design manager and publish the page.

Publish Master Page


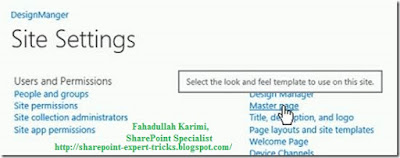
14. After publishing the page click setting menu and select "Site setting" link


Site Settings


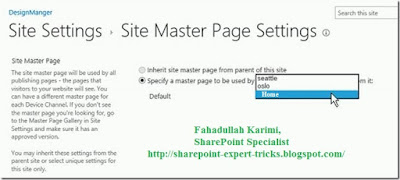
15. Click Master Page link and select the Home in site master page then click ok button.

Site Settings


Selecting New Master Page


16. Click the home page Home html page converted to SharePoint Master Page with default menus.

Page with New Master Page


Thank you very much

          Fahadullah Karimi

         SharePoint Specialist


Step by step procedures to create a Delegate control using Visual Studio 2013 in SharePoint 2013 Object Model in SharePoint 2013

Wednesday, August 24, 2016

Step by step procedures to create a Delegate control using Visual Studio 2013 in SharePoint 2013.


 Using the delegate control we can customize the SharePoint site controls without editing the master page by injecting user controls, scripts, css through this special type of control.

We are not customizing the existing (default) delegate control but we are creating our own control loading onto the SharePoint site.

The following code to add a delegate control

<SharePoint:DelegateControl runat="server" AllowMultipleControls="true" ControlId="IDofControl"/>


Some default Delegate controls:


SharePoint 2013:

SuiteLinksDelegate

SuiteBarBrandingDelegate

PromotedActions


SharePoint 2010:

AdditionalPageHead

GlobalSiteLink0

GlobalSiteLink1

GlobalSiteLink2

PublishingConsole

QuickLaunchDataSource

SmallSearchInputBox

TopNavigationDataSource.


Follow the Steps to Create a Delegate control in SharePoint 2013 using Visual Studio 2013:

1. Open Visual Studio 2013->File -> New Project, -> Empty Project.

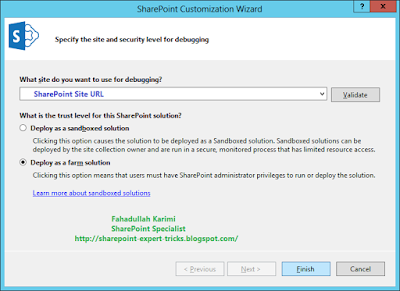
 Confirm SharePoint Site URL for debugging and choose deploy as farm solution.


SharePoint URL for debugging


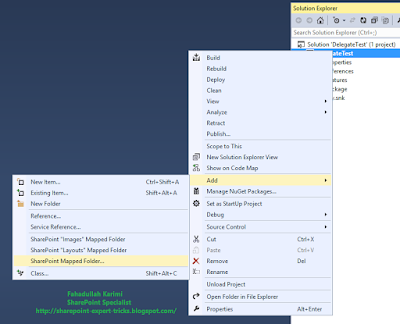
2. Add CONTROL TEMPLATES Mapped folder into the project. Right click on the project -> Add -> SharePoint Mapped Folder.


SharePoint Mapped Folder


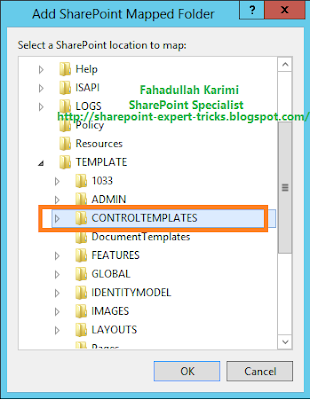
3. Select CONTROL TEMPLATES


 CONTROL TEMPLATES


4.  Now, Right click on the folder -> Add New Item and then select User Control (Farm Solution Only) to add User Control.


 User Control


5. Logic for delegate control. I have just put a text message.

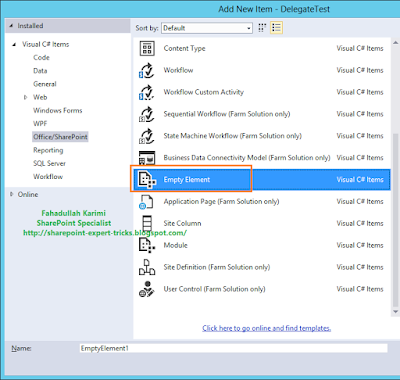
6. Again, Right click on the project -> Add New Item - > Empty Element.


 Empty Element


Now the solution and project as below


By using Delegate controls we can inject a code or control to a SharePoint master page without touching the code of the master page.docx


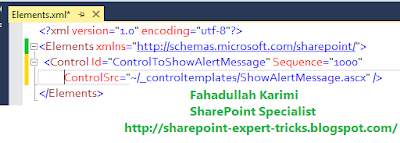
7. Add the following code in Elements.xml file:


<Control Id="ControlToShowAlertMessage" Sequence="1"ControlSrc="/_controltemplates/15/ShowAlertMessage.ascx" />


Control Id using this we can call in master page.


ControlSrc : Path of user control.


 solution and project


Now build and deploy the project. After deployed successfully, and you deployed in web scope then it will show in Site Feature


 site collection feature


8. Add call the control in master page by control id 

Just Open master page using SharePoint designer 2013 and Check out and Edit in Advanced mode and paste the following code in the master page.


<SharePoint:DelegateControl ControlId="ControlToShowAlertMessage" AllowMultipleControls="true" runat="server"></SharePoint:DelegateControl>


 ControlId is the id of user control given in Elements.xml file.


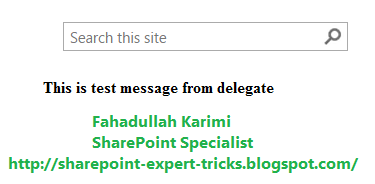
9. Now check in and publish the master page as a major version, and delegate control will appear:

 delegate control


If you do not want to show message then just deactivate this feature

Go to Site Settings -> Manage Site Features. And then in the Manage Site Features page you can deactivate the feature. The delegate control will not appear. 


Thank you very much

          Fahadullah Karimi

         SharePoint Specialist

Step by step upgrade from SharePoint 2010 to SharePoint 2013 How to Create Master Page Using Design Manager in SharePoint 2013

Tuesday, August 23, 2016

Step by step upgrade from SharePoint 2010 to SharePoint 2013


 Step by step upgrade from SharePoint 2010 to SharePoint 2013.


Installation a new SharePoint 2013 version over the earlier SharePoint 2010 version on the same farm is not supported.

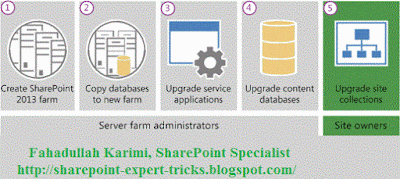
To upgrade from SharePoint 2010 Products to SharePoint 2013 following steps :


SharePoint 2010 to SharePoint 2013


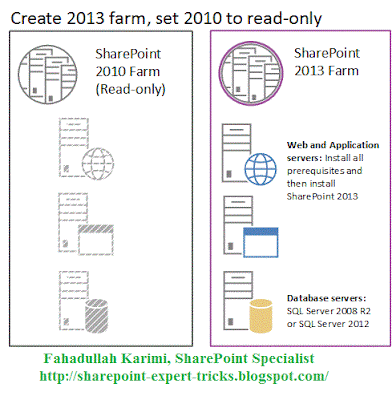
1. Create the SharePoint 2013 farm.

 
SharePoint 2013 farm

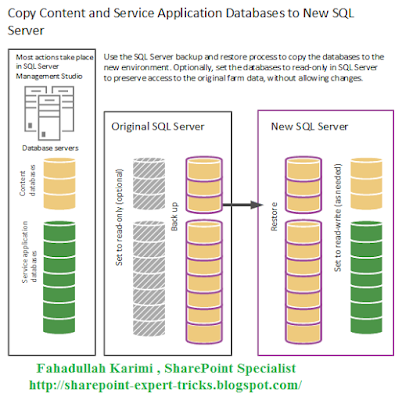
2. Copy the SharePoint 2010 Products databases.

 
SharePoint 2010 databases


3. Upgrade SharePoint 2010 Products databases and service applications.


Note : The database-attach method is only available for some Application service like :

Business Data Connectivity.

Managed Metadata.

PerformancePoint.

Secure Store.

User Profile (Profile, Social, and Sync databases)

Search administration

Other application services require reconfiguring again in the new farm.


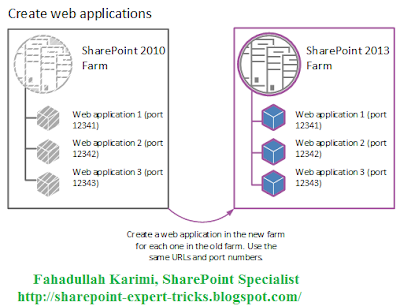
4. Create web applications.


Create web applications


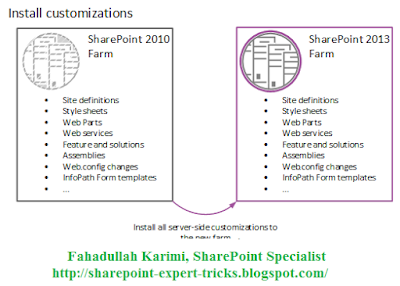
5. Install Customization.


Install Customization.

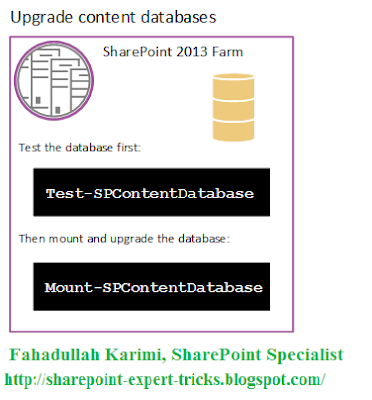
 6. Upgrade Content Database.


Upgrade Content Database


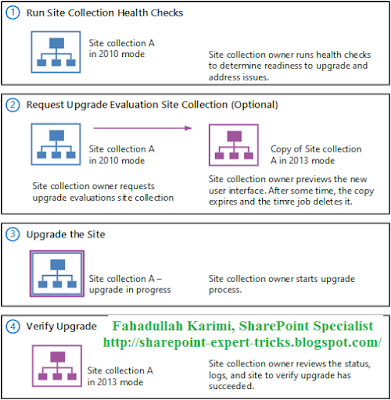
 7. Upgrade SharePoint 2010 Products site collections.


Upgrade site collections


   Reference 


Thank you very much

          Fahadullah Karimi

         SharePoint Specialist

This operation can be performed only on a computer that is joined to a server farm by users who have permissions in SQL Server to read from the configuration database Step by step procedures to create a Delegate control using Visual Studio 2013 in SharePoint 2013

Saturday, August 6, 2016

Install Workflow Manager on SharePoint 2013 Farm


 Step by step Workflow Manager Installation.


1. Login to Workflow Manager Server (or WFE Server) using WF Setup Account.


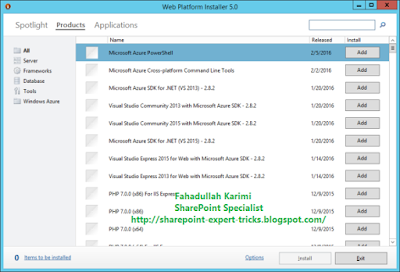
2. Download  Microsoft Web Platform Installer 5.


3. Open Microsoft Web Platform Installer 5 and navigate to Product Tab.


Microsoft Web Platform Installer


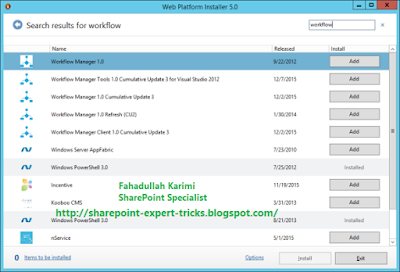
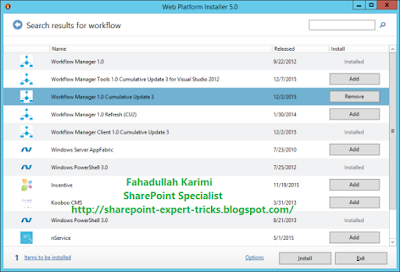
4. In search box > Type Workflow Manager.


workflow manager install


5. Press add then Click on install.


workflow manager install Start


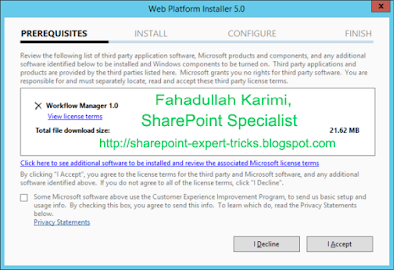
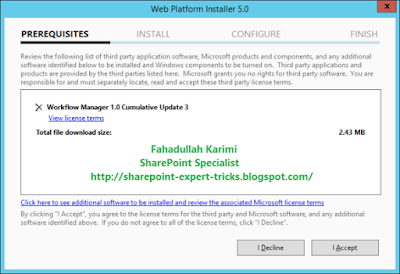
6. Click On I Accept.


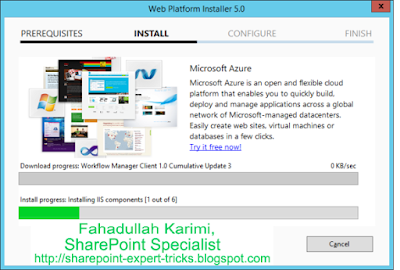
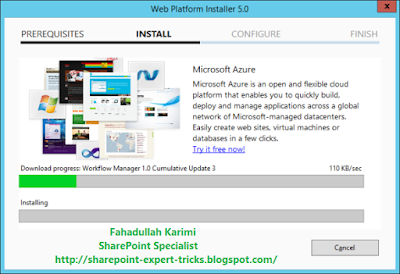
workflow manager installing


workflow manager install


workflow manager  installing Progress


workflow manager  installing Progress


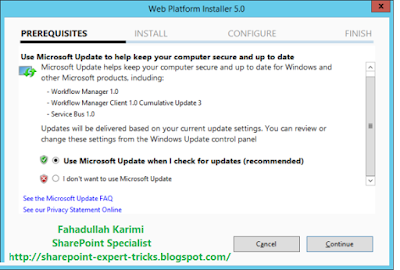
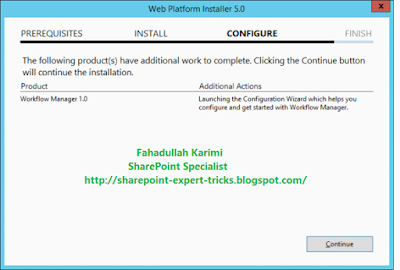
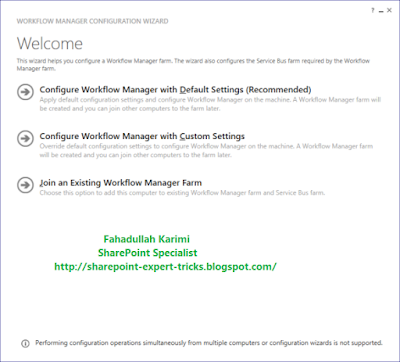
7. Click on continue


 workflow manager installing


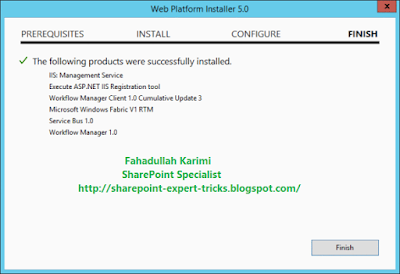
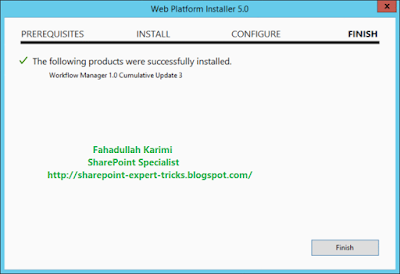
8. Close it and click finish.


 workflow manager installation finish


 Steps for Install Service Bus 1.0 Cumulative Update 1.


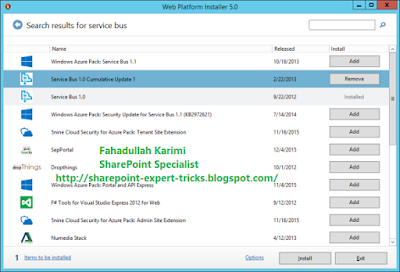
1. Open Web Platform Installer and in Search box type Service Bus then Click on Add > Install.


Web Platform Installer


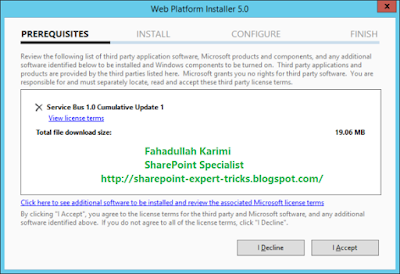
2. Click on Accept.


Accept


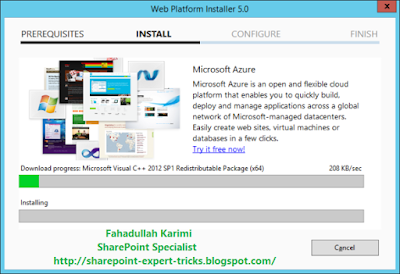
service bus cu installing


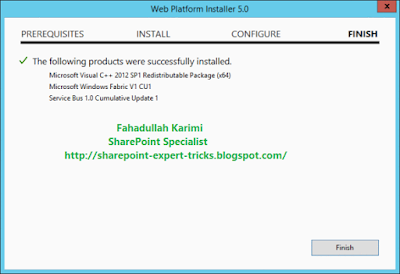
service bus cu installation Finish


Steps for Install Workflow Manager Cumulative Update 3.


1. In Search box type Workflow Manager and Click on Add > Install.


Workflow Manager cu


2. Click on Accept.


Accept


Workflow Manager cu Installing


Workflow Manager cu Finish


Thank you very much

          Fahadullah Karimi

         SharePoint Specialist

Prerequisites for SharePoint 2013 Workflow Manager Configure Workflow Manager on SharePoint 2013 Farm